
This is a version of How to Create a Moonriver/Ethereum Address posted on June 8, 2021. To create a Moonbeam/Ethereum Address you will need to follow the same steps when creating a Moonriver/Ethereum address.
A key feature that makes Moonbeam/Moonriver’s Ethereum compatibility unique is the use of a unified account system. Under such a scheme, token holders can utilize Ethereum-style accounts and keys to interact with network modules that are native to Substrate (governance, staking) — not only the EVM. Therefore, if you have an existing Ethereum account AND its associated private key, congrats! You already have a valid Moonbeam address.
This Moonbeam Foundation recommends creating an account using Ledger or MetaMask where you will be able to claim tokens through the Foundation dApp. However, for those who don’t have a valid Ethereum account, this guide will outline a few easy ways you can create one. Here are the methods we will discuss:
- MetaMask (hot wallet)
- Ledger Nano S or X (hardware wallet)
- Math Wallet (hot wallet)
- Nifty Wallet (hot wallet)
- Moonkey Tool (cold wallet)
Safety Note: This guide explains a few methods of creating a valid Ethereum account. You will need to take extra precautions to ensure you have securely generated an Ethereum account and are safely storing the private key/mnemonic. Private keys/mnemonics provide direct access to your funds and should be kept in a safe, offline location.
Creating a Moonbeam Address Using a Hot Wallet
Broadly speaking, hot wallets provide an “online” place to store crypto funds. They are generally easier to use and give faster access to your funds because they are always connected to the internet.
However, the benefits that this type of wallet gets from being always online come with some drawbacks, mainly related to security. While generally protected through a password, your private keys for signing transactions are still exposed to the internet, making it more susceptible to hackers.
Any Ethereum-style wallet that is able to connect to a custom Ethereum network should be able to connect to Moonbeam. Two examples are MetaMask and Nifty Wallet. Other hot wallets that will natively support Moonbeam are Math Wallet and Fearless Wallet.
In the following sections, you will find tutorials on creating a valid Ethereum-style address for each of these wallets.
MetaMask
To get started with MetaMask, you can follow this tutorial on the official MetaMask documentation page. Once you have installed the extension, follow the account creation wizard. Make sure to store your mnemonic safely.
When MetaMask is fully set up, you’ll have your Moonbeam address displayed at the top of the extension window. Clicking on it will copy its value to the clipboard.
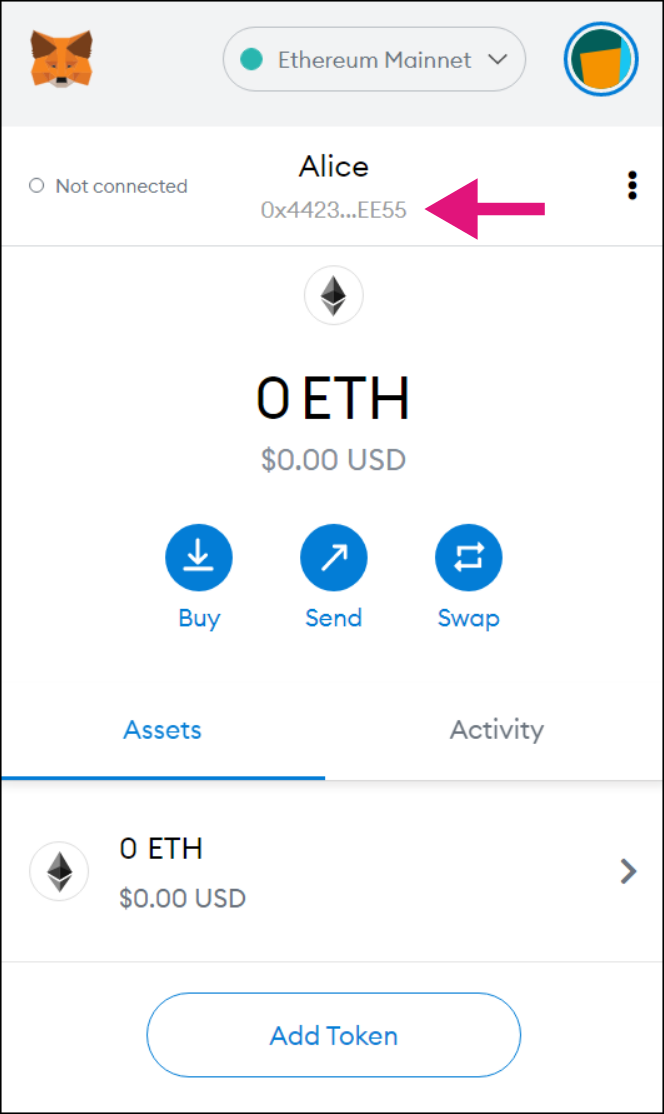
Safety Note: Please ensure you are securely generating an Ethereum account and safely storing its private key/mnemonic. Private keys/mnemonics provide direct access to your funds.
Once the Moonbeam Network had launched you will be able to connect MetaMask to Moonbeam.
Ledger (Nano S and Nano X)
To get started with Ledger, you can follow this tutorial that takes you through the steps of installing the Ethereum app on your Ledger hardware wallet. Make sure that you are running the latest Ledger Live and the latest version of the hardware wallet’s firmware.
Once you’ve installed the Ethereum Ledger app, you can connect it to MetaMask following this tutorial. After doing so, you’ll have your Moonbeam (Ethereum) address displayed at the top of the extension window. Clicking on it will copy its value to the clipboard.
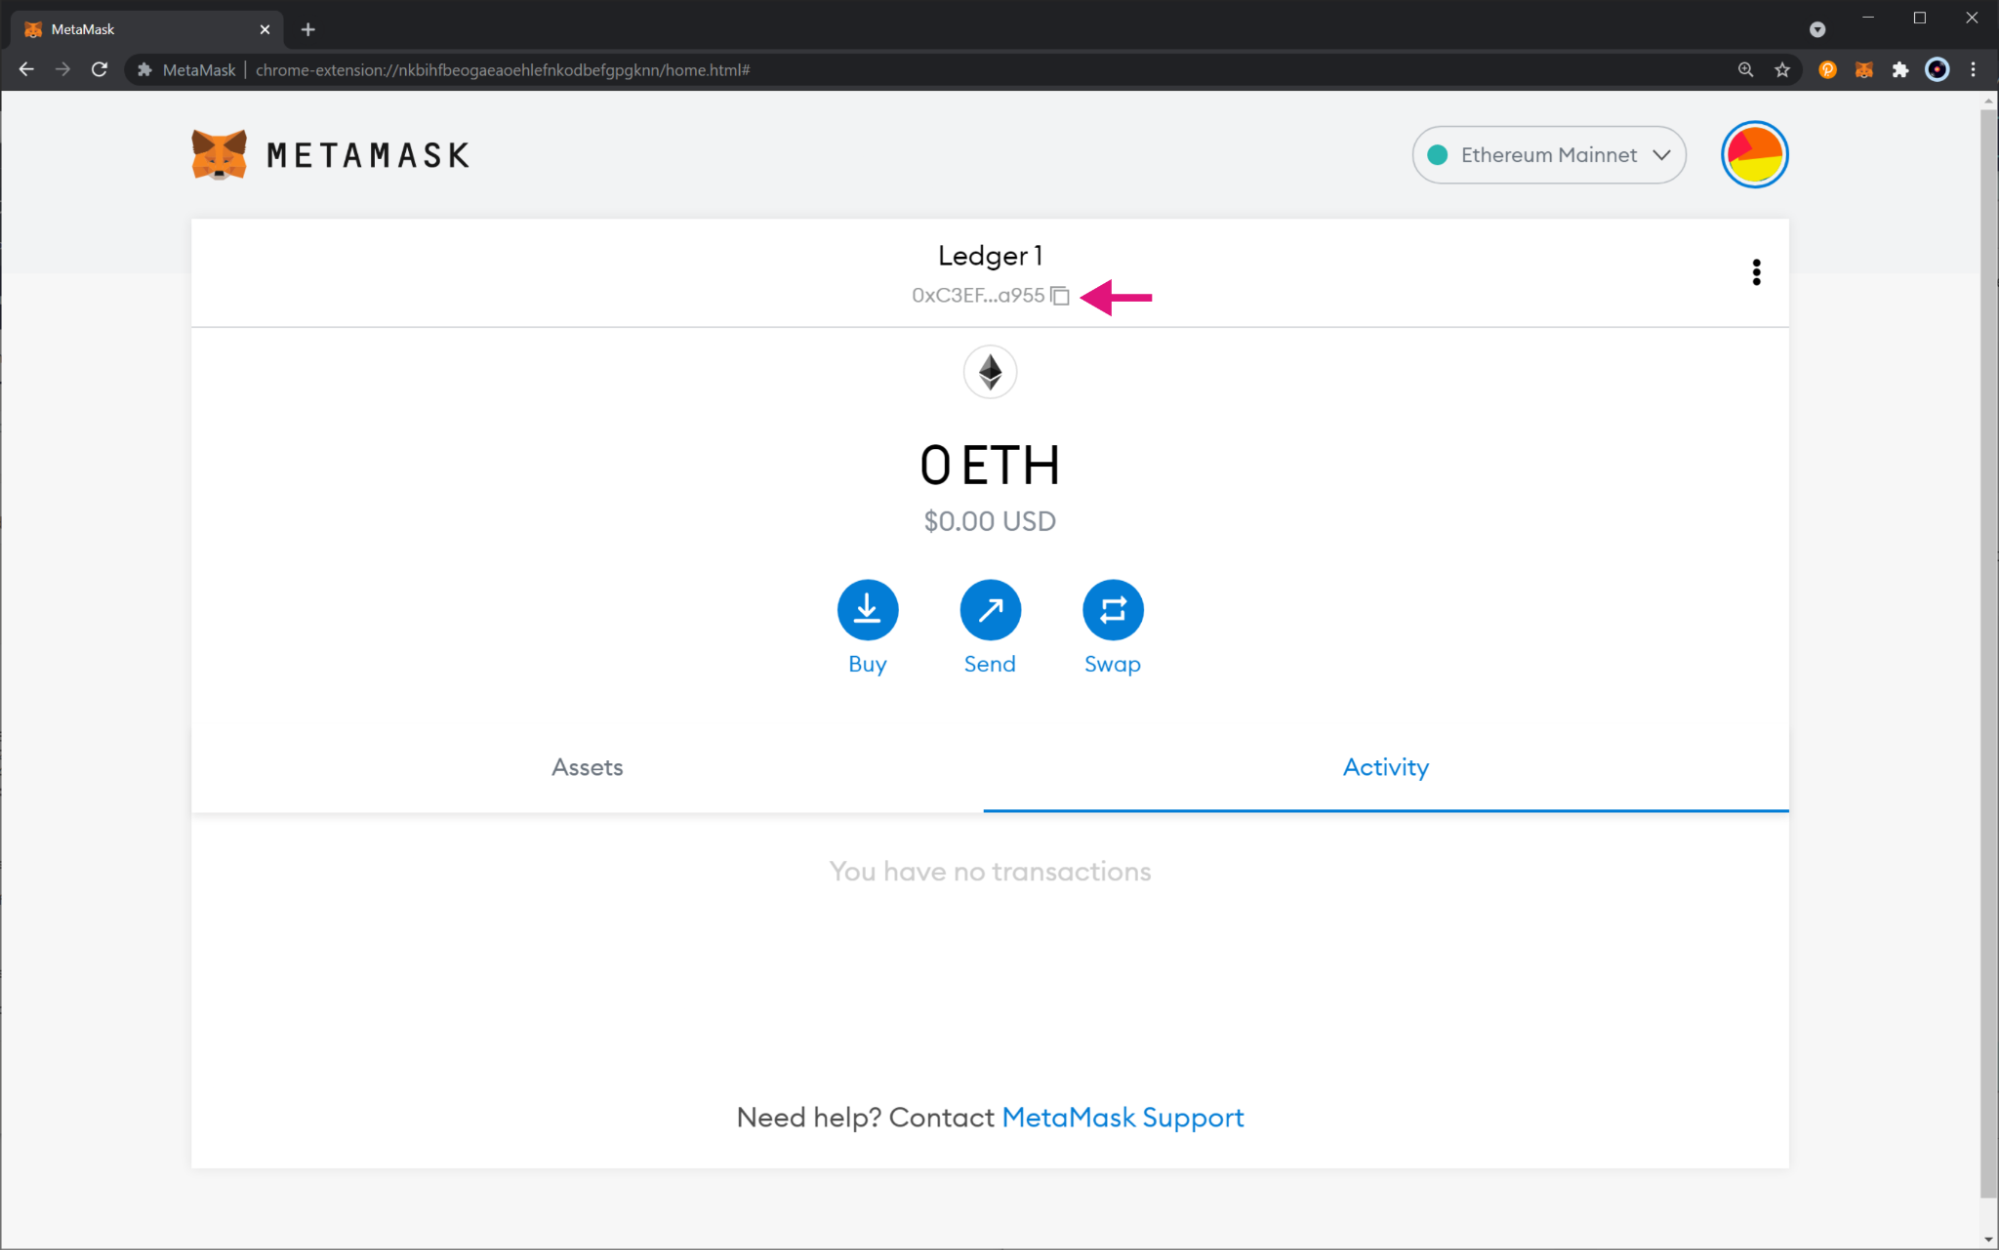
Safety Note: You are entirely responsible for securely generating an Ethereum account and safely storing its private key/mnemonic. Private keys/mnemonics provide direct access to your funds.
Then, you can connect MetaMask to Moonriver, to interact with it using your Ledger device. At the time of writing, Moonbeam has not launched, so you can’t connect to it yet.
Math Wallet
To get started with Math Wallet, you can follow this article from the Moonbeam documentation page. Once you have installed the extension, make sure you select Ethereum as a network, after which you can follow the wallet creation instructions. (make sure to store your mnemonic safely).
After you’ve finished creating a wallet, your Moonbeam (Ethereum) address will be displayed on the main screen of the extension window, from which you can copy it manually or using the wallet menu (by clicking on the three dots).
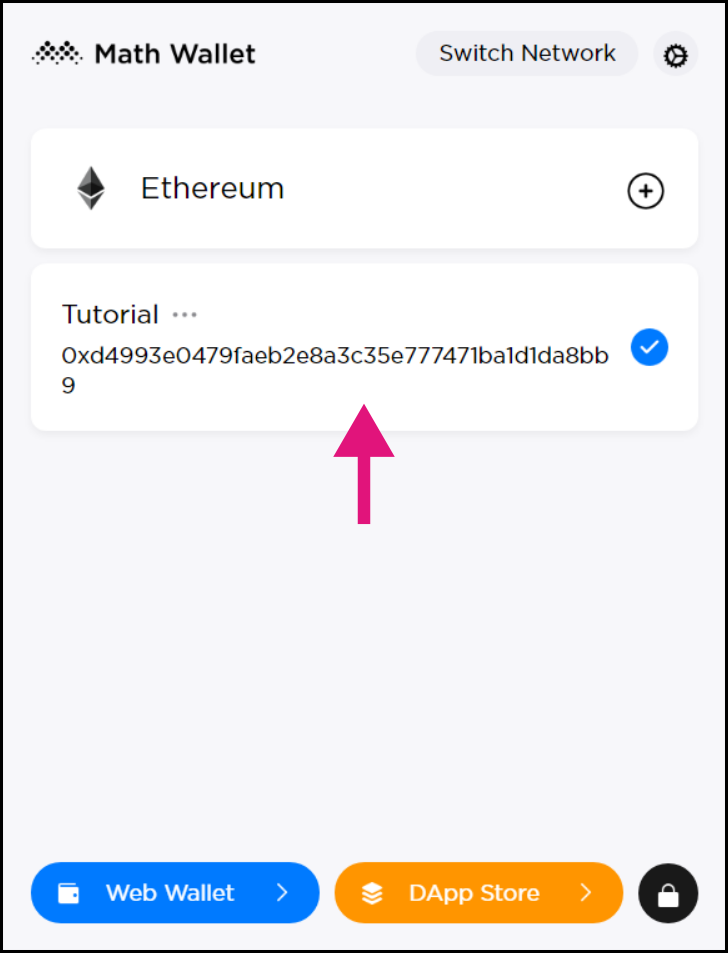
Safety Note: You are entirely responsible for securely generating an Ethereum account and safely storing its private key/mnemonic. Private keys/mnemonics provide direct access to your funds.
You can connect Math Wallet directly to Moonbeam once it is listed as a supported network.
Nifty Wallet
To get started with Nifty Wallet, you can follow this article. Once you have installed the extension, follow the account creation wizard. Make sure to store your mnemonic safely.
With Nifty Wallet fully set up, you’ll have your Moonbeam (Ethereum) address displayed at the top of the extension window. Clicking on the icon will copy its value to the clipboard.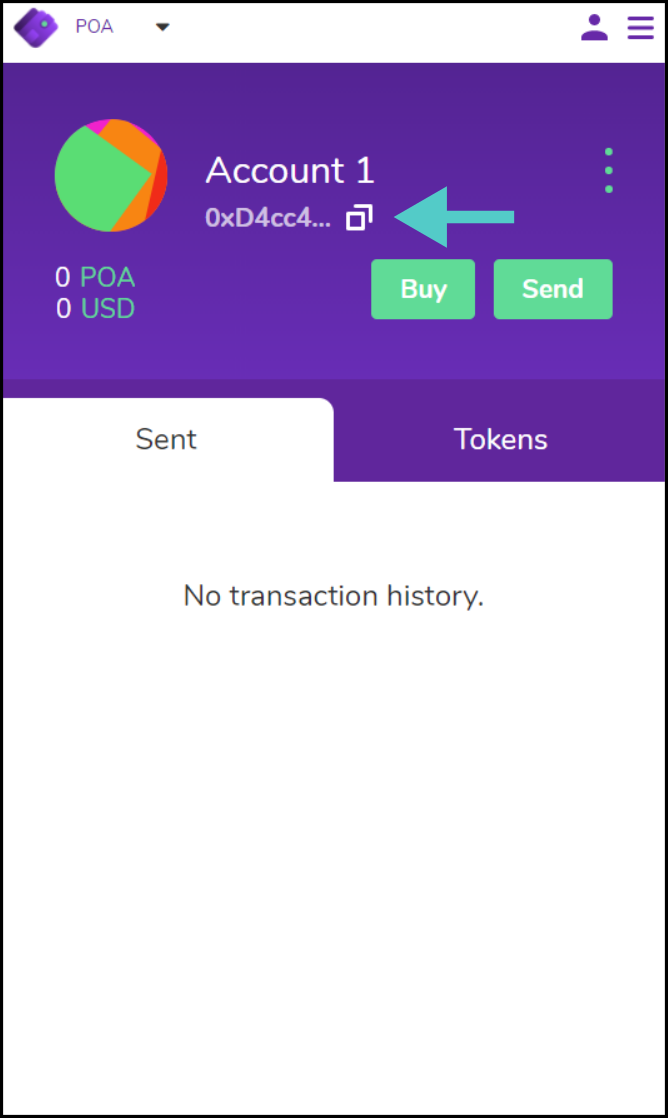
Safety Note: You are responsible for securely generating an Ethereum account and safely storing its private key/mnemonic. Private keys/mnemonics provide direct access to your funds.
You will be able to connect Nifty Wallet to Moonbeam once the network launches.
Creating a Moonbeam Address Using a Cold Wallet
Broadly speaking, cold wallets provide an alternative way to store crypto funds where the private key (used for signing transactions) is stored offline. These can include hardware wallets or even writing down the mnemonic seed/private key on a piece of paper and storing it securely.
Generally, they are much more secure than hot wallets because they are not connected to the internet, and transaction signing happens offline, so your private key is never exposed. However, funds are not usually as easily accessible as in hot wallets.
This tutorial goes through the steps of creating a Moonbeam-compatible account (mnemonic, private key, and public address) offline, using the moonkey tool.
Getting the Moonkey Tool
The first step is to fetch the moonkey binary file hosted on GitHub. To do so, you can download either an executable binary file (.exe) for Windows systems or a binary file (tested on Linux/Ubuntu and MacOS systems):
Executable: https://github.com/PureStake/moonbeam/releases/download/v0.8.0/moonkey.exe
Binary: https://github.com/PureStake/moonbeam/releases/download/v0.8.0/moonkey
Once you’ve downloaded the tool, ensure you have the correct access permissions to execute the binary file. Next, check that you have the right version by checking the downloaded file hash.
For Windows systems, open the terminal and head to the folder where the moonkey.exe binary file is located. Once there, you can use the certutil -hashfile command to calculate the SHA256 hash: 98cdf3f51a3275cb9ceb037b7e4ca679c8ede2995f97c3c17f712c6ad1d3f252
 For Linux-based systems such as Ubuntu, open the terminal and head to the folder where the moonkey binary file is located. Once there, you can use the sha256sum tool to calculate the SHA256 hash:
 019c3de832ded3fccffae950835bb455482fca92714448cc0086a7c5f3d48d3e

For MacOS systems, you need to open the terminal and head to the folder where the moonkey binary file is located. Once there, you can use the shasum -a 256 command to calculate the SHA256 hash: 019c3de832ded3fccffae950835bb455482fca92714448cc0086a7c5f3d48d3e

After you’ve verified the hash, it is recommended to move the binary file to an air-gapped machine (no network interfaces). You can also check the hash of the file in the air-gapped device directly.
Generating an Account with Moonkey
Using the moonkey binary file is very straightforward. Every time you execute the binary, the information related to a newly created account is displayed.
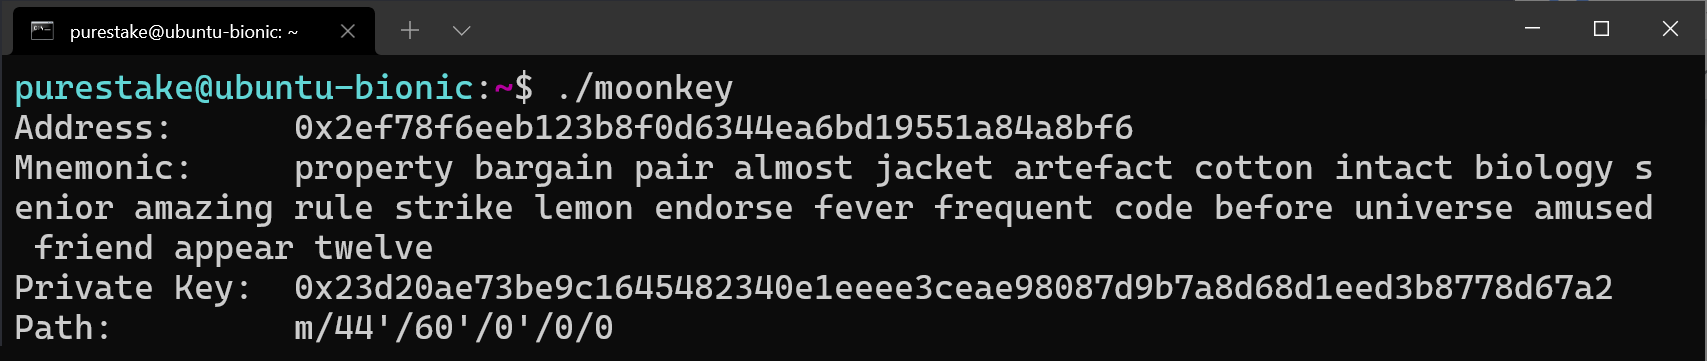
This information includes:
- Mnemonic seed: a 24-word mnemonic that represents your account in readable words. This gives direct access to your funds, so you need to store these words securely
- Private key: the private key associated with your account, used for signing. This is derived from the mnemonic seed. This gives direct access to your funds, so you need to store it securely
- Public address: your account’s address
- Derivation path which tells the Hierarchical Deterministic (HD) wallet how to derive the specific key
Safety Note: Please safely store the private key/mnemonic. Private keys/mnemonics provide direct access to your funds.
It is recommended that you use the binary file in an air-gapped machine. Make sure you store your mnemonic/private keys in a secure location.
Your account address (public address) is a valid Moonbeam account that you can use for the crowdloan.
Other Moonkey Features
Moonkey provides some additional functionalities. The following flags can be provided:
–help – prints help information
–version – prints version of moonkey you are running
–w12 – generates a 12 words mnemonic seed (default is 24)
The following options are available:
–account-index – provide as input the account index to use in the derivation path
–mnemonic – provide as input the mnemonic
Hardware Wallet Support
For more information on hardware wallet support, check out our articles on using Trezor, and Ledger!


